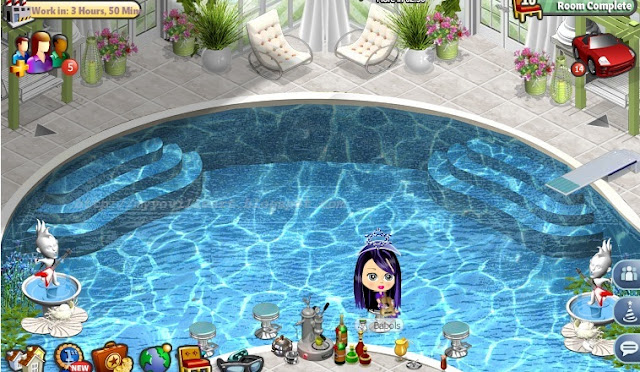
If you have decorated a room or clicked the edit button to move things around, you probably know by now that there are certain items that can “float” or things that you can place anywhere in and outside of the room, including the black spaces around it. Rugs, shelves, frames, posters, some plants, some freebies are “floaters”. There are also items like chairs that you cannot place at certain angles inside the room, near the room edges or on those black spaces. You also can’t place most items on swimming pools. So, wouldn’t it be great to use some extra space to give your room the semblance of space and depth?
The “Profiler Method”
The best working method, as of this writing, is the Profiler Method also know as the “Left Click/Right Click”. I just call it the “Profiler Method” for lack of any other name and mostly because I see that little flash menu every time I do the right click. This method does not work on Firefox or Safari, it occasionally works on Chrome and works perfectly on Internet Explorer (IE).
1. On edit, left click the item you want to move, the item will appear transparent and “lifted” from the box. Right click while holding the left then release.
2. Left click on the spot where you want to move the item, right click and the item is moved. Hold your mouse for a second to make sure the item stays. If the item moves back to your inventory, just repeat the process.
Here’s a video to illustrate the process:
When this “Profiler Method” won’t work for you, there are two more ways to conquer the black space …
THE QUICK TOSS METHOD
This is how I usually do it … I would place the item on either the leftmost side or rightmost side of the inventory bar depending on where I want the item placed — left or right. On edit, I would remove other items from my inventory bar until the item I want to use is placed on the right or left edge of the bar. Using the edit function, quickly toss or flick the item to the direction where you want to place it. Since the black space or the edge of the room is almost at the very edge of the inventory bar, it will only take a flick of the wrist …. say about an inch to two inches toss.
You will notice the item is “transparent” and goes back to your inventory bar. Watch the item, it will be “normal color” once it stays. Do it again and again until you get the item in place. You may “feel” the cursor or mouse kinda “sticky” and eventually, you will get it. Save the room first before rotating the item, this is to make sure the item stays if in rotating you lose it back to your inventory.
THE SLOW METHOD
The slow method has the same “principles” as the “quick toss”. Here, you drag the item SLOWLY towards the edge and out the inventory. Again, watch the item till its color turns normal then surely the item stays. The downside here is you can only place the item at the black space at the edge of the inventory bar.
Practice makes perfect. Try using any of the methods and conquer your black space. Make a pool bar, sit on the cliff, the possibility of your imagination is endless.
Note: this is a “recycled” post from my blogsite and facebook notes 08/10 on the same subject


